
In this post, I will show you how to make $10,000 from setting up and running a Shardeum Node step by step.
I will make it so easy that anyone can follow the steps and run this node.
Interacting with the Shardeum node positions you to receive the airdrop of its SHM tokens which is estimated to be up to $10,000 or more.
Stay with me, and I will explain how you can run this node in the following subheadings.
What is Shardeum?

Shardeum is an EVM-based L1 that uses dynamic state sharding to achieve linear scalability while attaining atomic composability across shards.
Simply put, Shardeum can increase its TPS (transaction per second) capacity with each validator added to the network to retain low fees forever.
It provides the highest throughput capacity of any EVM-based L1 without sacrificing decentralization.
If you still don’t understand, know that, Shardeum is a layer one that is fast and decentralized.
Shardeum has raised a total of $23.6M in funding from various investors and has confirmed the following:
- It’s going to launch its token called SHM.
- An airdrop of a total of 25,400,000 SHM to various participants including early contributors, incentivised testnet participants, and mainnet users.
Like in Babylon Node, running a Shardeum node makes you an early contributor.
Some past Test Node Operators have received as high as $80,000.
For example:
- TIA test node operators received $10,000
- GRT operators received over $25,000, and
- MINA users got over $80,000
I will show you how to set up a node and run it in the following subheading.
How To Set Up and Run A Shardeum Node
There are two ways to run this – one is a lot more technical, and the other is easier.
The steps for the more technical method include:
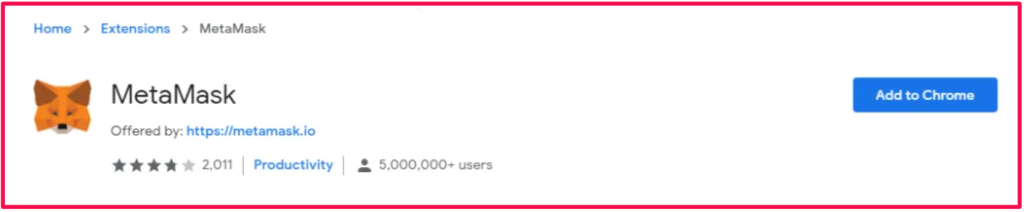
Step 1 – Install Metamask
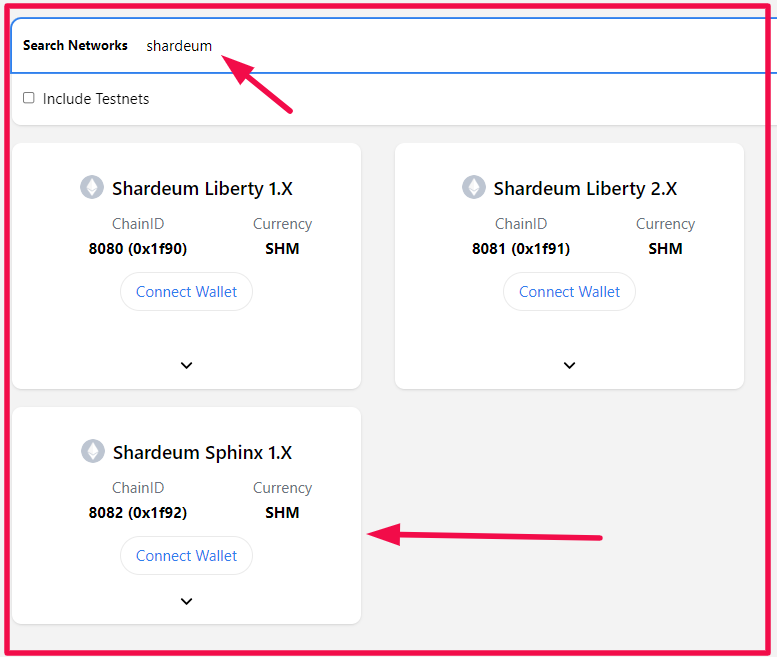
Step 2 – Add the Shardeum Network to Metamask
Visit www.chainlist.org, type ‘Shardeum’ in the search bar, and connect your wallet to Shardeum Sphinx.
Step 3 – Request test token from Discord
Copy the Shardeum wallet address from your Metamask and go to Discord.
Click on ‘faucet’ and type: /faucet (click space tab) wallet address
Then wait for the tokens to arrive in your wallet.
Mine took less than 5 minutes to reflect.
Step 4 – Buy VPS
The required minimum specification is 4 CPU Core, 250 GB SSD, and 16GB RAM.
Visit Contabo to purchase a VPS with the required specifications.
Go through the purchasing process and give it some time to set up.
Once done here, we move over to the next step.
Step 5 – Download and install Putty.
If you are using a Windows PC, it is easier for you to download Putty.
Simply visit https://www.puttygen.com/ and download it.
But if you’re a Mac user, the process is complicated but can be easier if you purchase Parallels.
Parallels allows you to have Windows on your Mac, and with Windows, you can download Putty.
When that is done, move to the next step.
Step 6 – Login to Putty with your IP
Go back to Contabo and copy the IP address of your VPS.
Come back to Putty and paste the IP address to log in.
Also, enter the password that was used to set up the VPS.
We are gradually getting to the technical part. But don’t worry, I will guide you through.
Step 7 – Enter the Commands
Visit Shardeum Docs to get the commands to enter in Putty.
Step i. Install docker with this command.
sudo apt install docker.io
sudo apt update
sudo apt install docker.io
docker --version
sudo curl -L "https://github.com/docker/compose/releases/download/1.29.2/docker-compose-$(uname -s)-$(uname -m)" -o /usr/local/bin/docker-compose
sudo chmod +x /usr/local/bin/docker-compose
docker-compose --version
Step ii – Download and install the validator.
curl -O https://gitlab.com/shardeum/validator/dashboard/-/raw/main/installer.sh && chmod +x installer.sh && ./installer.shThe terminal will ask questions about your setup settings.
Give permission to collect validator data for bug reporting:
By running this installer, you agree to allow the Shardeum team to collect this data. (y/n)?:Enter ‘y‘ to set up the web-based dashboard:
Do you want to run the web based Dashboard? (y/n):Set a password for dashboard access:
Set the password to access the Dashboard:Add a custom session port for the web-based dashboard or hit enter for port 8080:
Enter the port (1025-65536) to access the web based Dashboard (default 8080):Input a custom external IP address or use an automatically detected IP address:
If you wish to set an explicit external IP, enter an IPv4 address (default=auto):Add a custom internal IP address or use an automatically detected IP address:
If you wish to set an explicit internal IP, enter an IPv4 address (default=auto):Set the first p2p port (default 9001):
To run a validator on the Sphinx Validator 1.X network, you will need to open two ports in your firewall.
This allows p2p communication between nodes.
Enter the first port (1025-65536) for p2p communication (default 9001):
Set the second p2p port (default 10001):
Enter the second port (1025-65536) for p2p communication (default 10001):Add a custom path or install to root:
What base directory should the node use (defaults to ~/.shardeum):Wait for the installation process to complete.
Step iii – Open the validator CLI
Make sure you are in the root directory by running:
cdGo to the hidden Shardeum directory:
cd .shardeumStart the CLI by running the following shell script:
./shell.shMoving on, we go to step 8.
Step 8 – Visit your node (on your browser)
Visit the URL in the code below and where you have <server_ip>, input the IP address from Contabo.
https://<server_ip>:8080/CAUTION
You might see a warning page when accessing this address in your web browser.
Ignore this warning and continue to the validator dashboard.
Another way to work around this warning is to do this if you are using Firefox or Chrome:
From the three bar button (hamburger) menu button, go to Settings
Click on “Privacy & Security” on the left.
Scroll down to locate “View Certificates” and click that button.
Click the “Servers” tab, then click “Add Exception”.
Type: “https://localhost:8080” (or your remote/VPS server’s IP and port),
then click “Get Certificate”, then click “Confirm Security Exception”.
The result should be the server/localhost in the list, click “OK”.
Refresh the operator dashboard page and the certificate error should be gone.
You will be asked for your password set during setup.
This password is the one used to set up Putty.

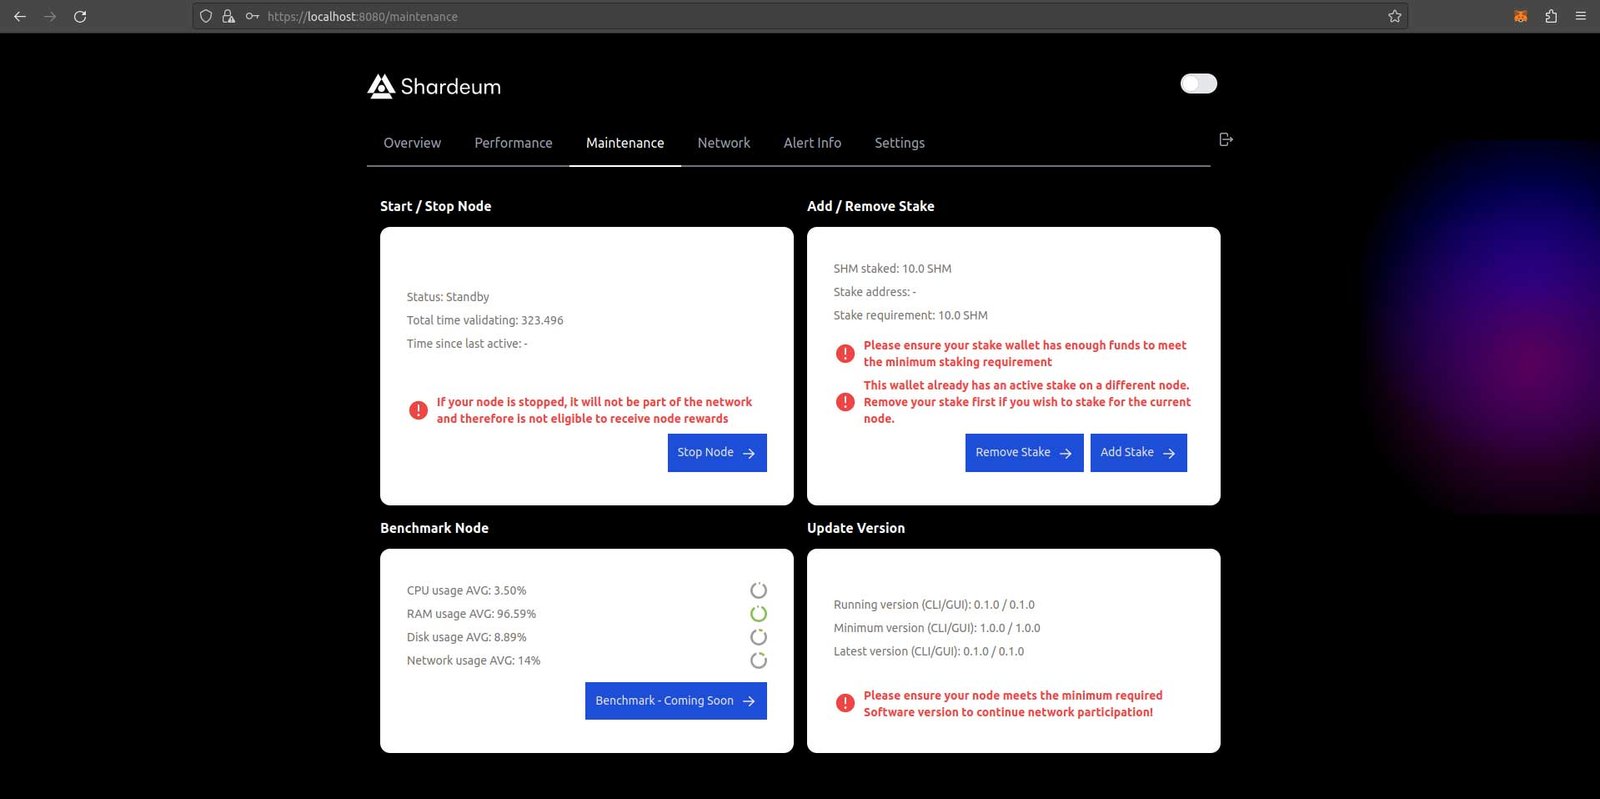
You should see the “Overview” page for the Shardeum Validator Dashboard in your web browser:
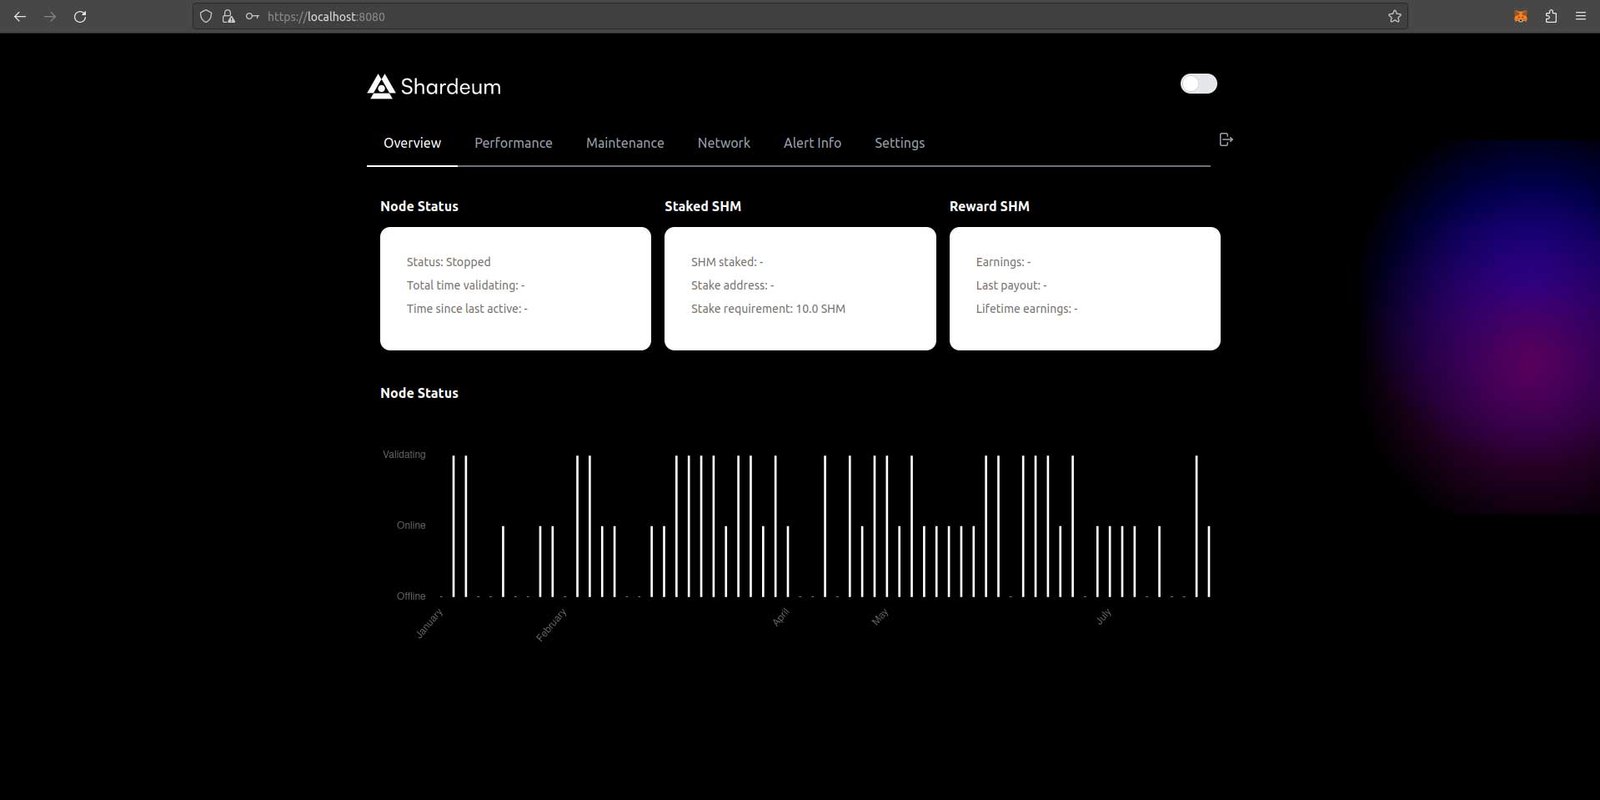
Step 9 – Start Validator
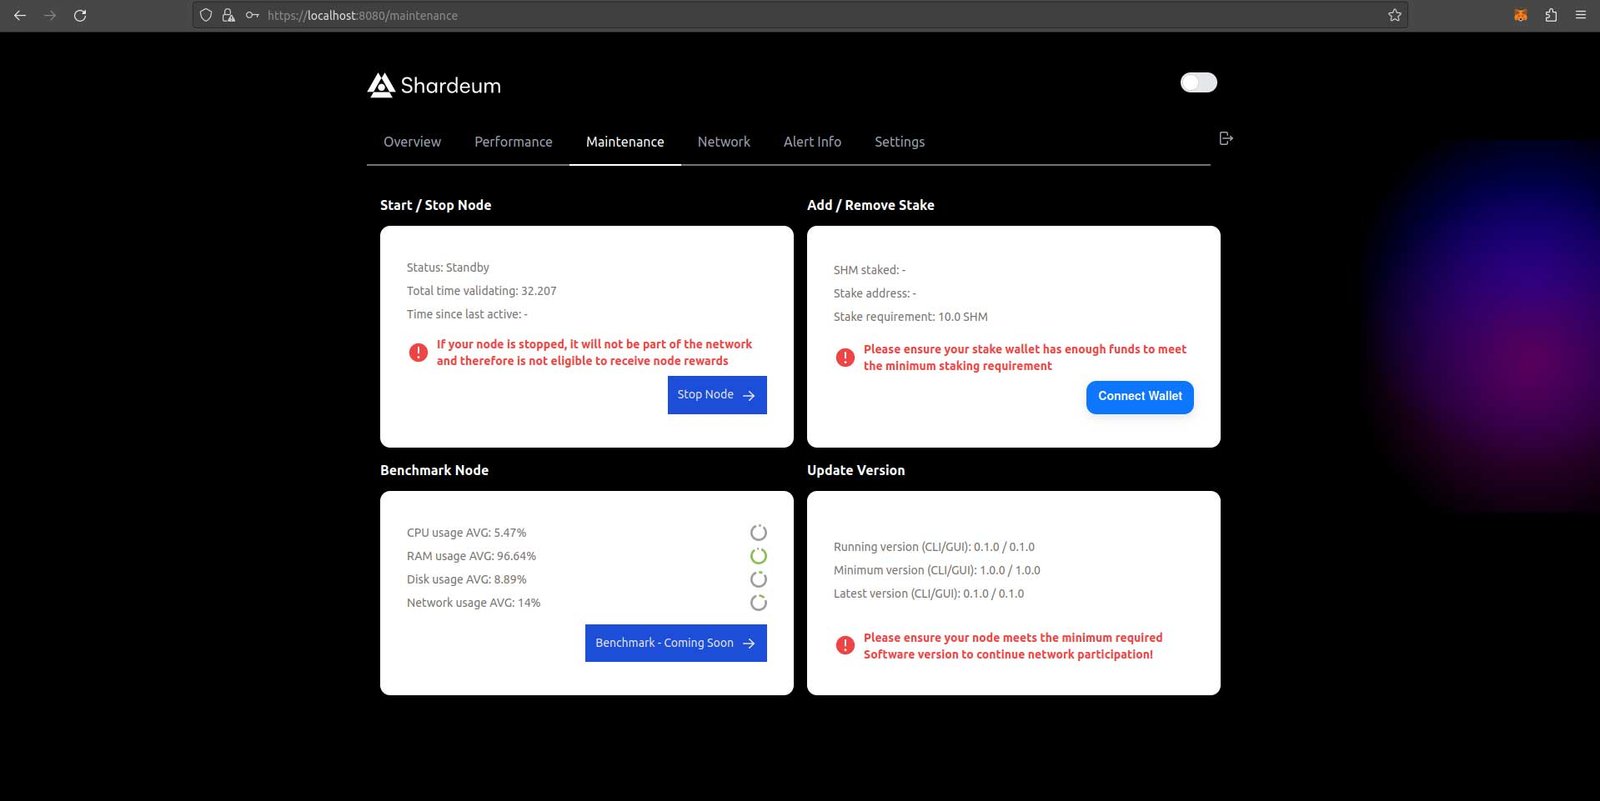
Go to the “Maintenance” page, then click the “Start Node” button in the top left white box.
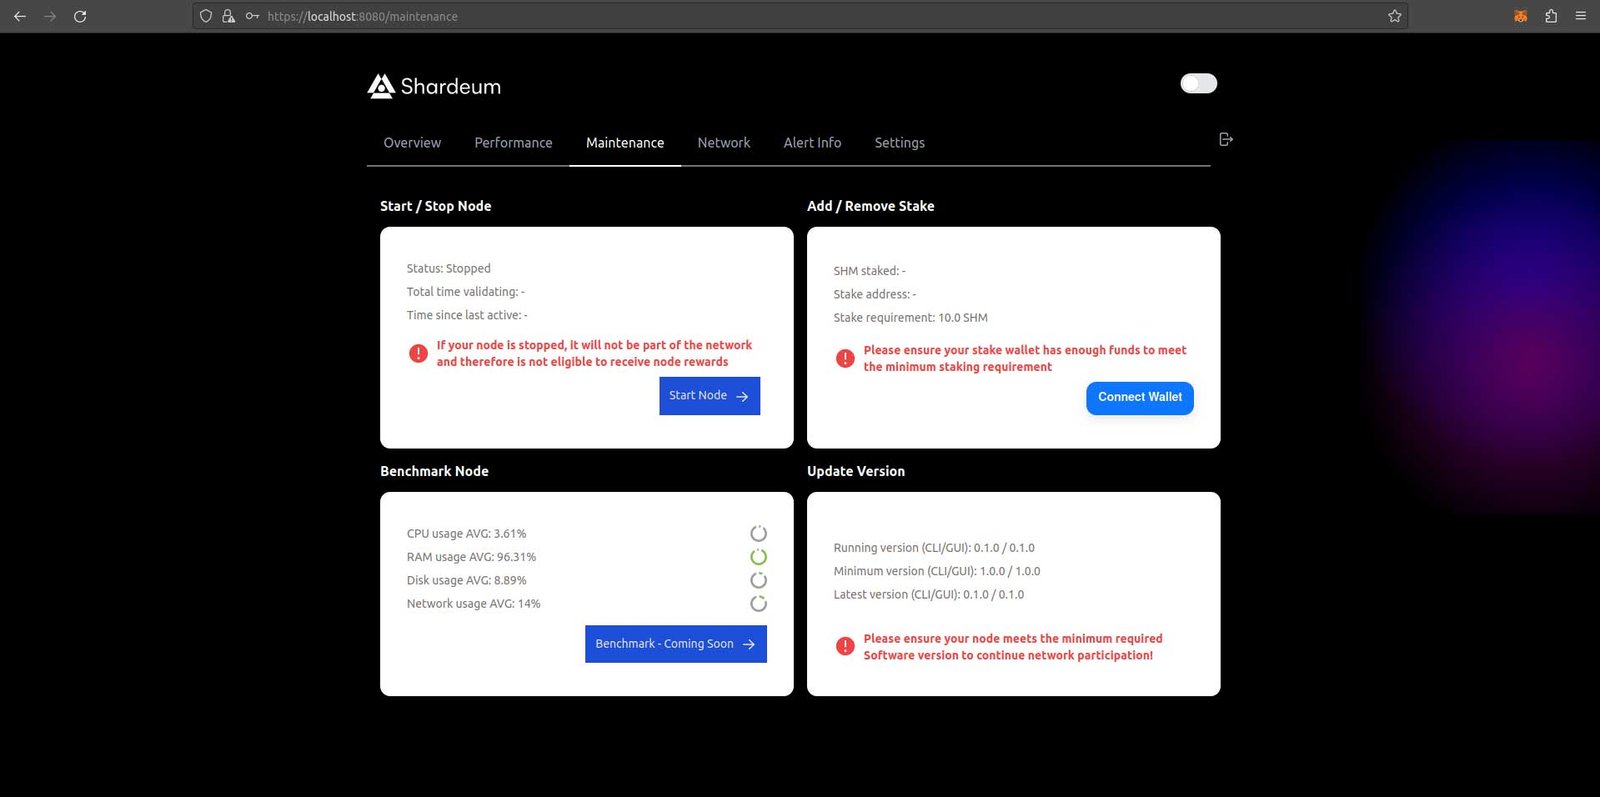
The node runs correctly if the “Start Node” button now says “Stop Node.”
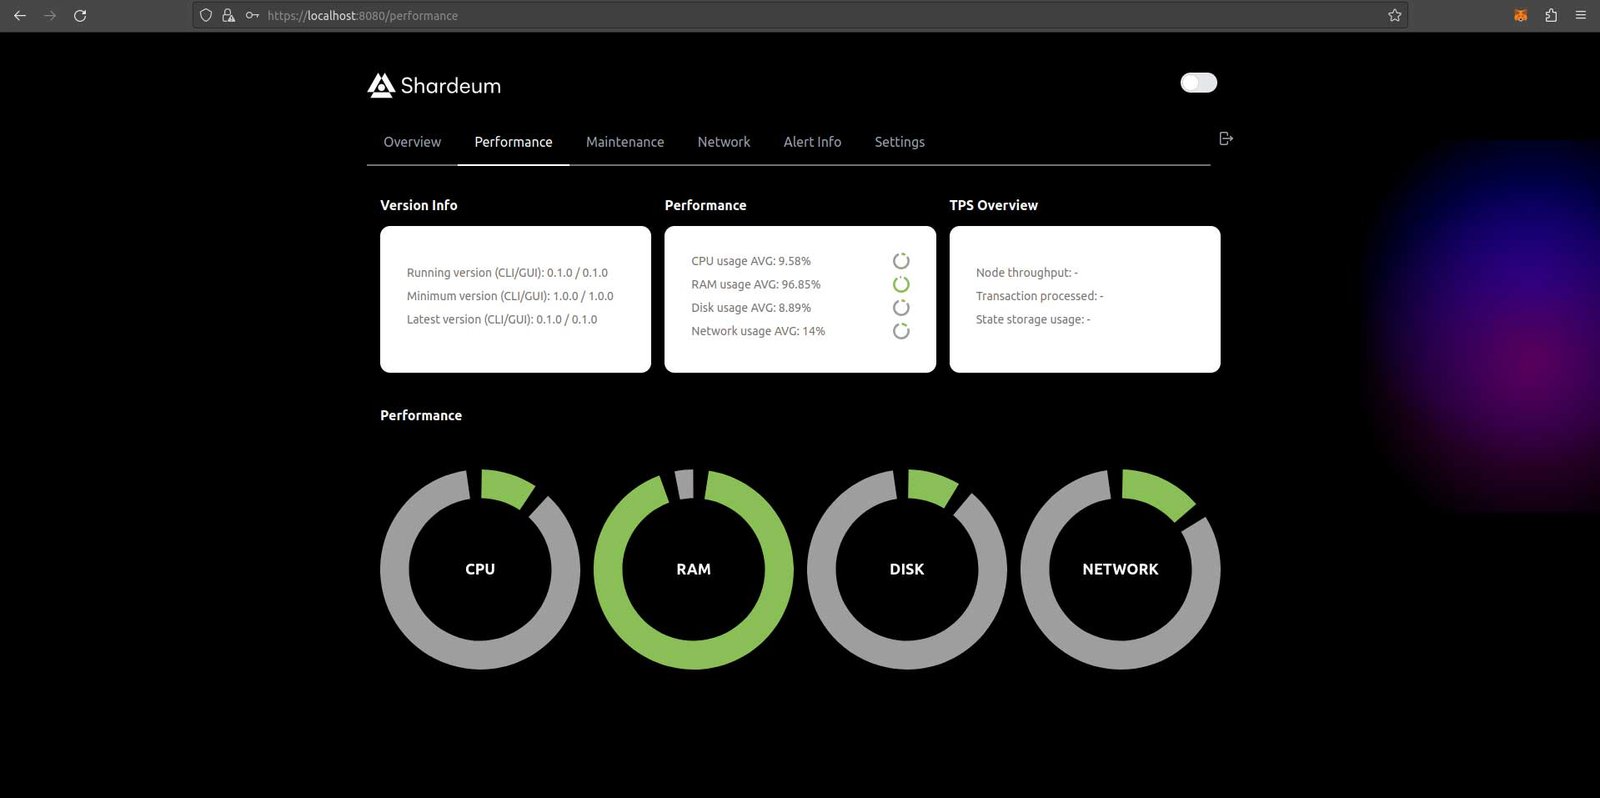
Go to “Performance” to see your node’s hardware performance here:
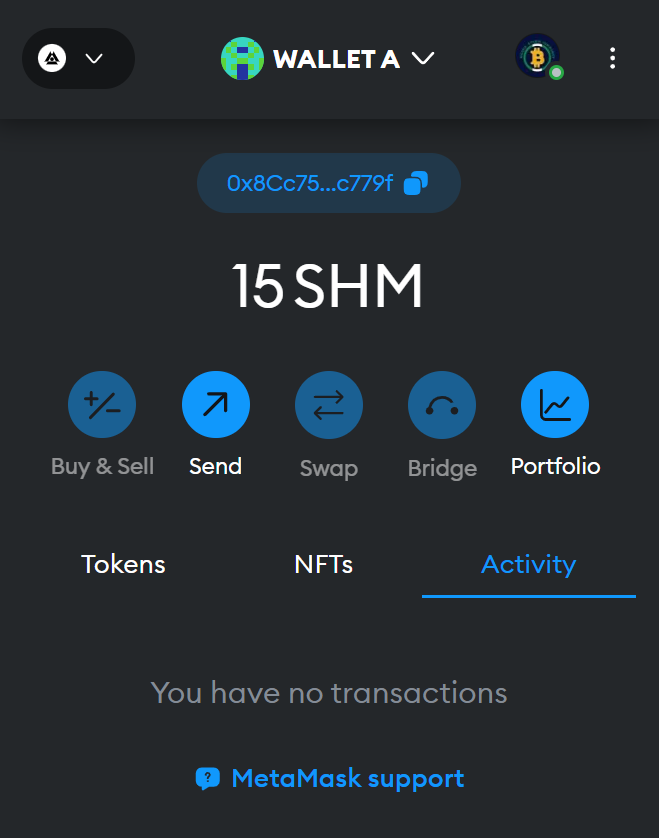
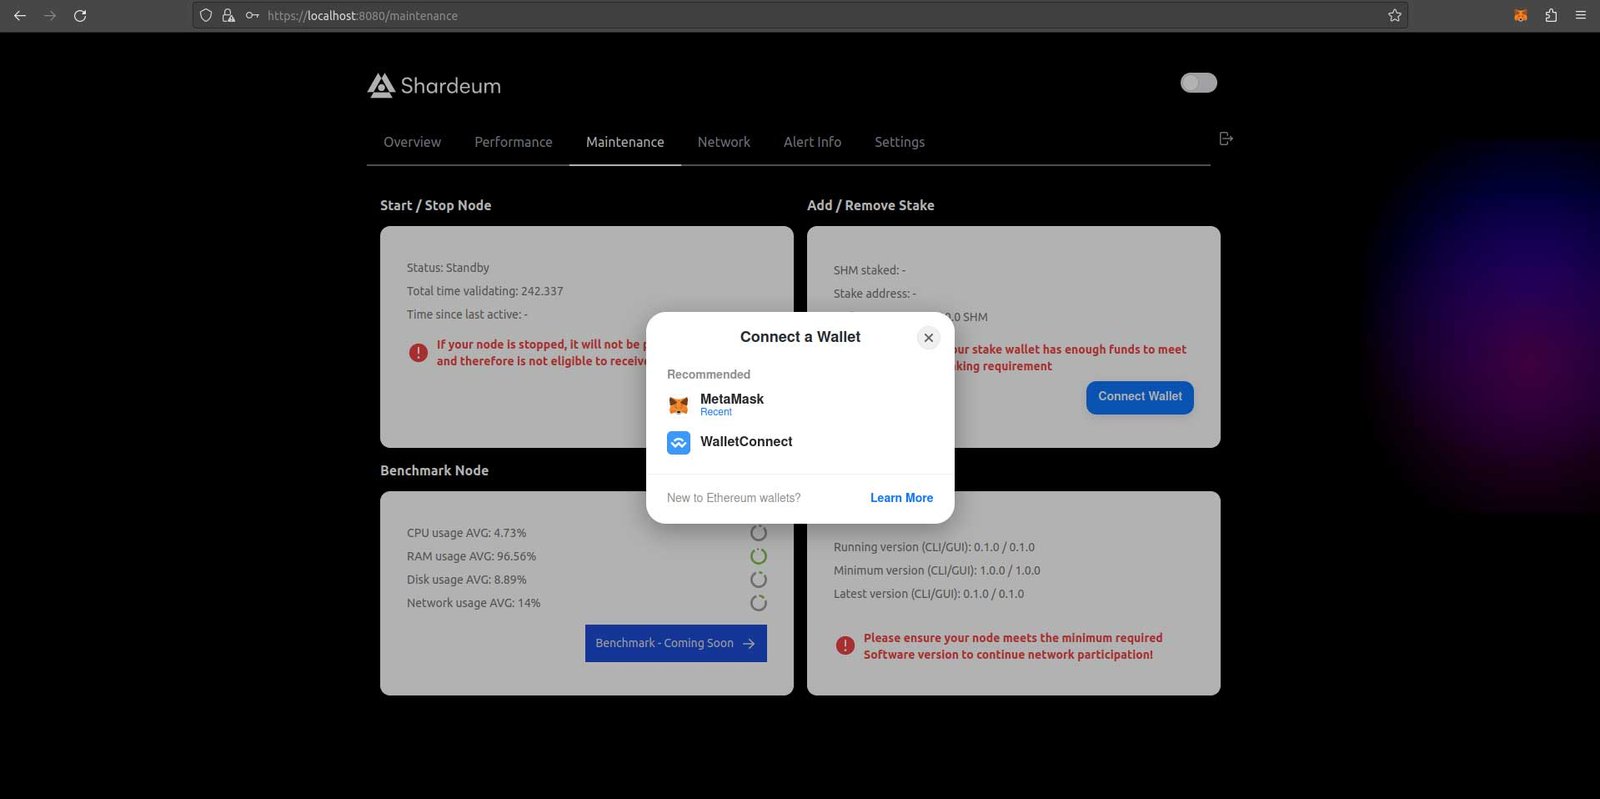
Also, click on ‘Connect Wallet’ and connect your wallet.
After connecting your wallet, you should see the following:
When you click “Add Stake,” you will see the following:
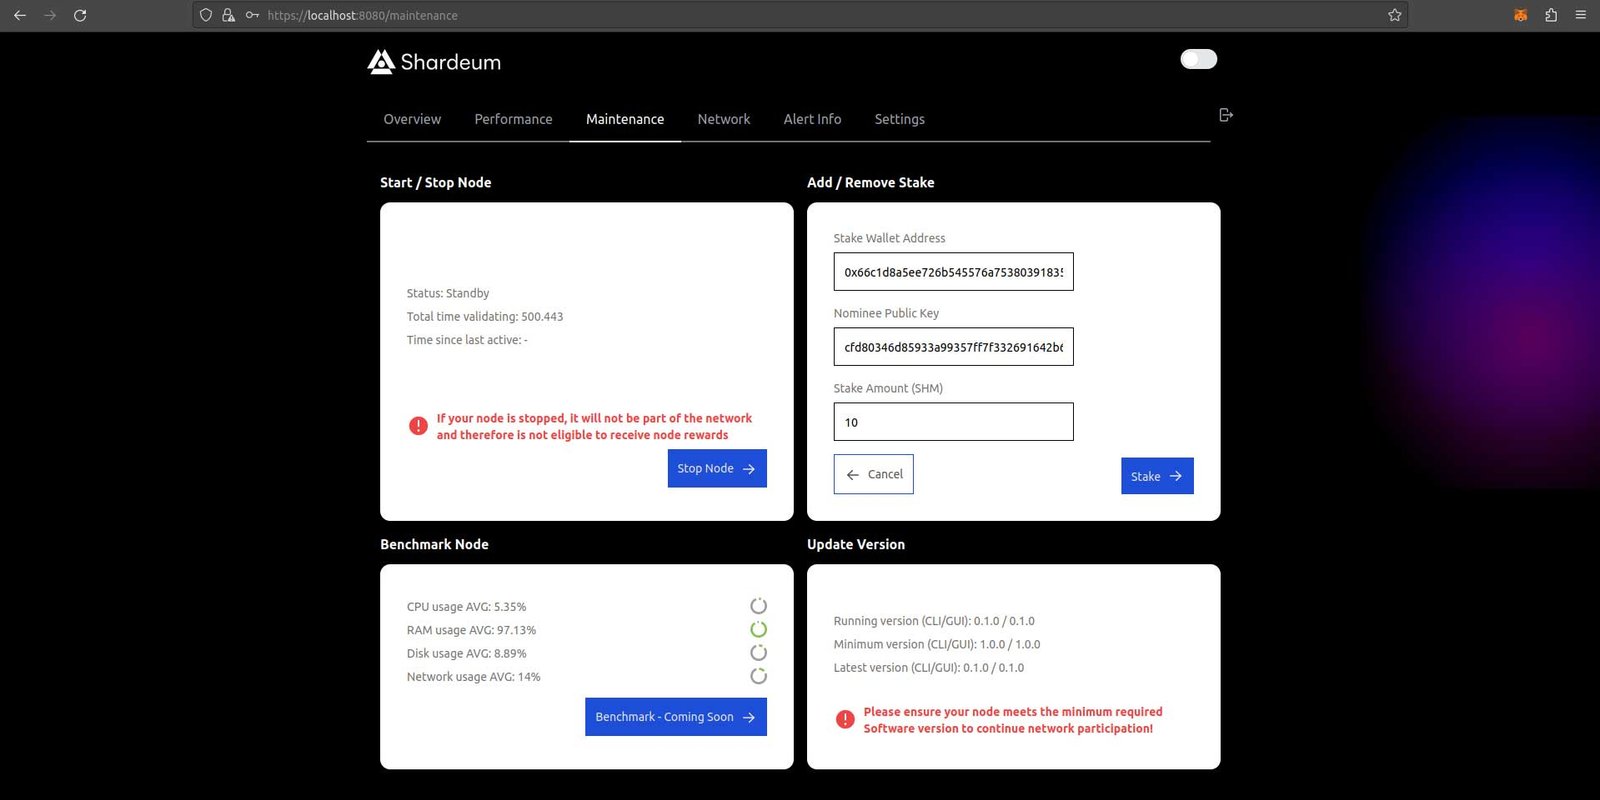
Commit SHM test tokens. These are the test tokens you requested earlier from Discord.
If you skipped that step, no issues! Go ahead and request SMH tokens following the process in Step 3.
Once all fields are filled, click the “Stake” button.
Your wallet will ask you to sign the transaction.
Once the transaction is signed and complete, you have staked your SHM tokens successfully.
NB: You can stake at least 10 SHM tokens to earn rewards.
Note that you can request more test tokens to add them to your stake. You can do that after every 24 hours.
This will cost you about $17.5/ Month and about 1 to 2 hours to set up.
If all these seem overwhelming, you can try the easier way.
The easier method requires approximately 15 minutes for setup, but it will cost about $19 a month.
The steps include:
1 – Install Metamask
2 – Add the Shardeum Network to Metamask
3 – Request test token from Discord
4 – Go to https://mintair.xyz/
5 – Click on ‘Shardeum’ to complete the setup.
Note that the Shardeum Node on Mintair is sold out at press time.
You have to be constantly checking to see when it will be available so you can set it up.
Alternatively, you can join its Discord group to keep up with Mintair and know when more nodes will be available.
To participate in its incentivized testnet tasks, join the Discord group to keep up to date with tasks.
Conclusion
Here, I will draw the drapes on today’s post.
Hope it was worth your time.
It is said nothing good comes easy, hence, you have to put in some work before you earn.
Will you try running the Shardeum node?
Are you running it already? What has been your experience(s) so far)
Leave me your comments and questions (if any) in the comment box below.
I will be looking out for them.
Follow us on X (formerly Twitter), where we drop ways you can make some cool dough.

")

0 Comments