
In this post, I will show you the easy way to create an ERC20 token.
Lately, there has been a rise in the number of tokens. You’ve probably thought of creating your own token at one point.
Whether your intention is to add to your knowledge of the crypto world, raise project funds via ICO, or just have fun, you will find this post very helpful.
If you are ready, let’s get to business!
Post Summary
Today’s discussion on ERC20 token is grouped under the following subheadings:
You can click on any item above to read its details right away.
Enjoy your read!
What Is An ERC20 Token?
An ERC20 token is a token that is designed on the Ethereum blockchain using the ERC20 standard. That is why they are called ERC20 tokens.
While ERC is an acronym for Ethereum Request for Comment, 20 identifies the proposal.
ERC20 is an official protocol of the Ethereum network. It receives proposals for improvements to the network.
This standard provides a set of rules that apply to all ERC20 tokens thus, they interact seamlessly with one another.
Moreover, crypto wallets and exchanges use the standard to incorporate various ERC20 tokens onto their platforms.
The same standard is used to facilitate transactions between ERC20 tokens and other cryptocurrencies.
ERC20 tokens are stored and sent via Ethereum addresses and transactions. Also, it uses gas to measure transaction fees.
There are up to 200,000+ ERC20 tokens in existence with a lot of them doing well in the market.
For example, on CMC, EOS is presently the 13th most popular crypto with a market cap of $2,310,806,430 (as of 2nd November 2020). Impressive, huh?
Other ERC20 tokens that are doing well include VeChain (VET), ICON (ICX), OmiseGO (OMG), Zilliqa (ZIL), Aeternity (AE), 0x (ZRX), Bytom (BTM), Populous (PPT), Maker (MKR), RChain (RHOC), Augur (REP), etc.
In the next section, I explained how you can create an ERC20 token.
Tag along!
How To Create An ERC20 Token
There are two ways to go about this. You can choose to it yourself (which will involve coding) or you can do it the easy way.
Let’s start with the steps involved in doing it yourself. There are 5 basic steps:
1. Define your token
The first step is to give your token a name, symbol, number of decimal places, and amount that will be supplied.
For example,
Token’s Name – JudeWorldCoin
Symbol of Token – JWC
Decimal Places – 0
Number of Tokens in Circulation – 1,000
Note: the number of decimal places you choose will be added as zeros to the total supply i.e. 100 coins with 4 decimal places becomes 1,000,000 coins. And then as little as 0.0001 coins can be sold or transferred.
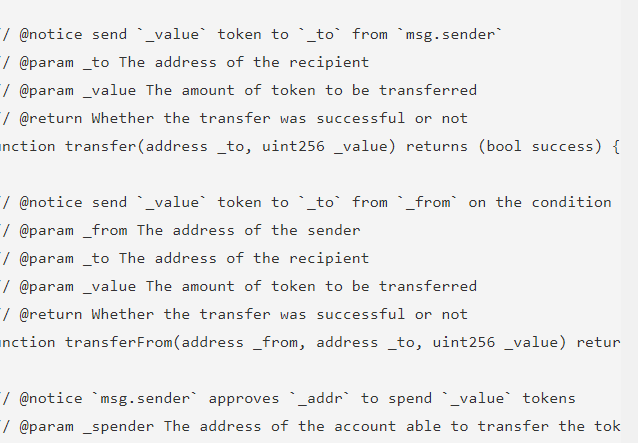
2. Code the contract for your token
After you have defined your token, you need to code its contract.
This is where you list the transactions that your token can be used for.
You will also input all the information you listed in step one as well as the wallet the coins will be sent to.
To code the contract, you can use any ‘editor’ like sublime.
And if you are not great at coding, you can hire a developer to do it for you.
This what it looks like:
3. Test Your Token
The next step after coding the contract for your token is to test the token.
At this point, the MetaMask browser will be of great help because it features different test networks that you can use e.g. Ropsten
For the testing, you only need to fund your wallet with dummy ethers.
While you are on the test network, compile your contract code using the ‘Solidity Remix Compiler’ feature.
After compiling and submitting your contract, you will then be redirected to the transactions page on Etherscan where you can load your coin on the MetaMask Tokens.
If your tokens are added, it means you have succeeded. Congrats!
4. Verify Your Contract
You can skip this part but it is important you do it so that your token will be valued by the public.
All you need to do is to copy the contract address you were given when you compiled your contract and paste it on Etherscan.
Then hit ‘verify’ and ‘publish’.
Now, when people view your coin, the ‘unverified’ button will not be checked.
5. Launch your token on the Main Ethereum Network
Having succeeded in creating your token using dummy ethers, you can now switch to the Main Ethereum Network to launch it.
You already have your contract code, so, just compile it again on this network and submit.
Once your tokens have been added, go ahead and verify it.
Note that here, you will need to fund your ether wallet with real ethers before your request can be processed.
Thumbs up if you made it to this step!
Ps: you can read this post: How To Deploy Ethereum Smart Contract – A Step By Step Guide for a clearer picture of the steps above.
The Easy Way!
Say, you do not want to go through all the steps listed above, there is an easier alternative.
Platforms like ERC20 TOKEN Generator make it easy for you to create an ERC20 Token.
ERC20 TOKEN Generator is a decentralized app designed by Vittorio Manacori to help people deploy their tokens very quickly.
Your token can be ready in a minute using this app.
All you need to do is, visit the site, supply the required information on your coin, and make payment.
Here, you do not have to write any codes. The generator takes care of the coding for you.
However, you must install the MetaMask Browser extension and fund your Ether wallet for successful token creation.
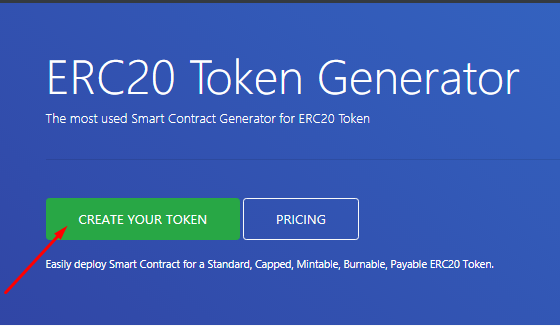
How The ERC20 Token Generator Works
1. Go to ERC20 TOKEN Generator and click on ‘create your token’
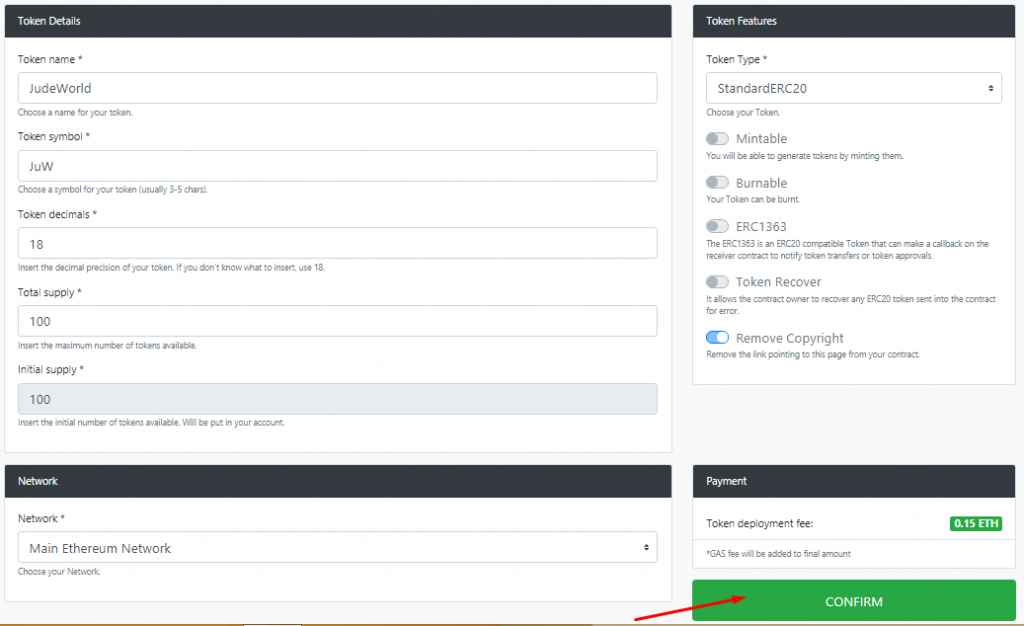
2. In the new page, provide the required information for your token like name and symbol.
Then hit ‘confirm’.
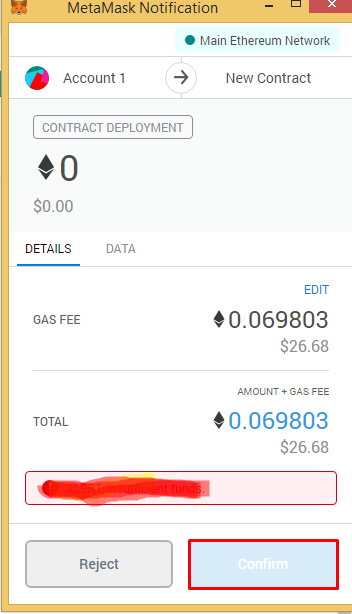
3. MetaMask will request your approval to debit your wallet for the coin to be created
4. After you have made the payment, you will be provided with a contract address which you can verify on Etherscan.
5. While on Etherscan, you can go ahead and load your tokens.
Quick and easy!
If you need further details on this platform to be sure you are not throwing your Ether to the wind, you can check here.
Apart from the ERC20 Token generator, you can also check out My Wish, Guarda, and Smartz.
Before we call it a wrap, I will show you how to keep your tokens safe.
Keep reading!
How To Keep Your ERC20 Token Safe
Now that you have launched your tokens, I’m sure that you want to keep them safe to avoid any form of bad news.
You can keep your ERC20 tokens safe by storing them in a hardware wallet.
I recommend you use any of the Ledger wallets because of their ‘Ethereum application’ feature, which makes them very compatible with ERC20 tokens.
Conclusion
We have come to the end of our discussion on how to create an ERC20 token.
You can now see that it is easy to create especially with the ERC20 token generator platform.
So tell me:
Would you use the ERC20 token generator to create your token?
Or, would you prefer to code your contract yourself?
Let me know your thoughts in the comments section right now.
Also, share this post with other crypto lovers on your list. Thank you!
In case you need a tutor…
We can teach you how to trade cryptocurrencies profitably. Simply enroll for our Crypto Trading Mastery Course by visiting www.ctmastery.com. You can also join our Telegram community at https://t.me/ctmastery. See you there!

")

Hi,
Your Blog well describes how to create a BEP20 token effectively. Here I would like to suggest one best Token Generator Platform Solutions Providers.
Have a Look >> – cointool-app-clone-script